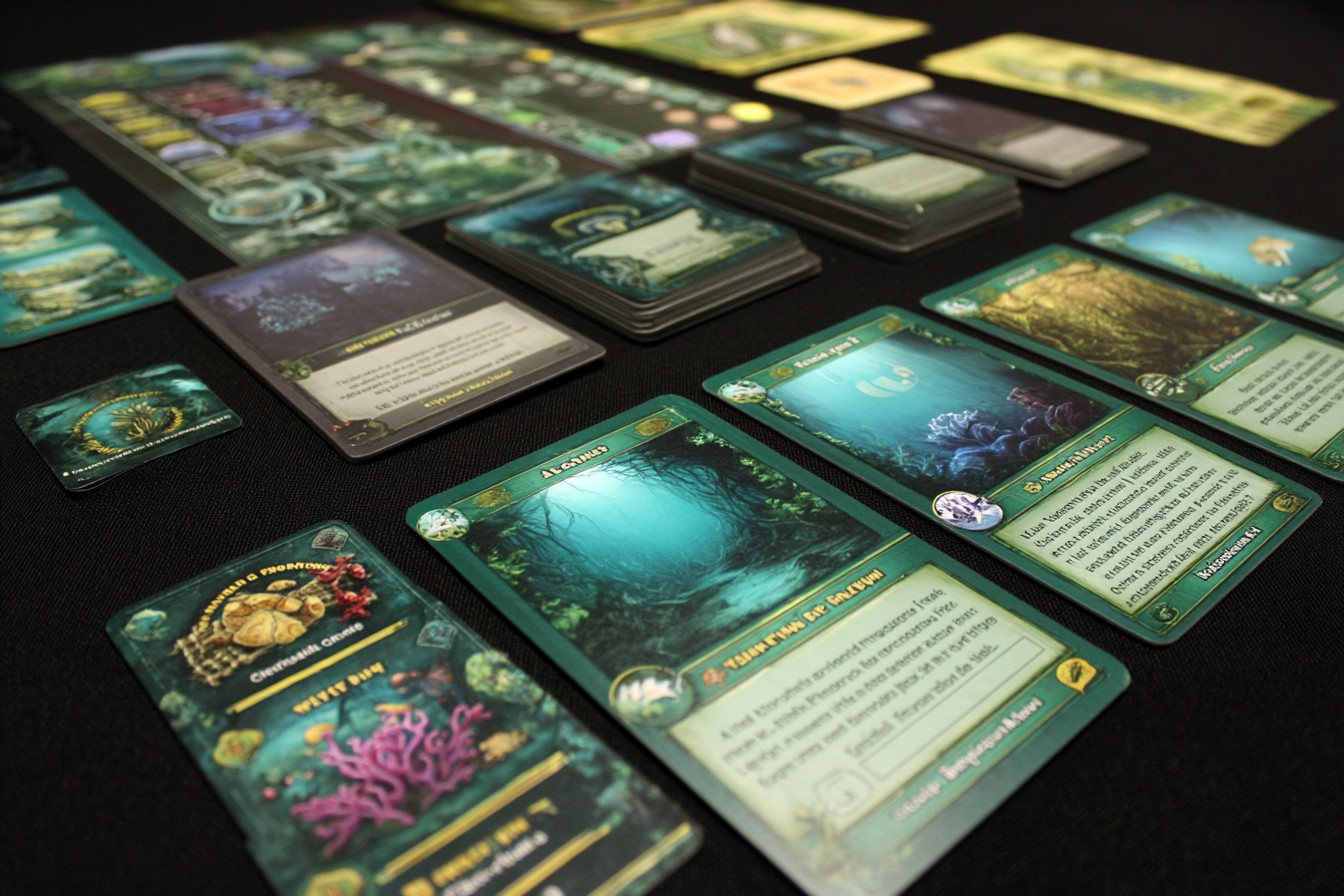
I used to be terrible at selecting power cards in Spirit Island. Just awful. I’d get so excited seeing a flashy Major Power like “Volcanic Eruption” that I’d grab it without considering whether it actually fit my spirit’s development path. My wife Linda still teases me about the time I took “Transforming Wounds into Renewal” with Lightning’s Swift Strike and then couldn’t play it for three full rounds because the elements were all wrong.
That was about forty games ago. Since then, I’ve logged another 130+ plays (yeah, I’m a bit obsessed) and developed a framework for power selection that’s dramatically improved my win rate, even at the highest difficulty levels. What I’m sharing isn’t just theory—it’s been tested across dozens of games with every spirit in my collection, including all the expansions.
Let’s start with the biggest mistake I see players make: treating elements as secondary considerations. They’re not. They’re the backbone of your entire strategy. I played a game last month with my friend Steve—he was River Surges in Sunlight and chose a Major Power with no Water or Sun elements early in the game. His spirit stalled out for two full rounds. Meanwhile, I was playing Ocean’s Hungry Grasp and carefully selected powers that matched my Water/Moon focus, which let me trigger my innate powers consistently from mid-game onward.
But elements aren’t everything—that’s the second common mistake. I’ve seen new players grab cards just because they match their elements, ignoring energy cost, range limitations, or thematic fit. My framework balances these considerations.
Here’s how it works:
First, I assess my spirit’s growth trajectory. Some spirits like Thunderspeaker or Vital Strength of the Earth have clear element paths dictated by their powerful innate abilities. Others like Many Minds Move as One or Keeper of the Forbidden Wilds have more flexibility. Understanding where your spirit is headed helps eliminate options immediately.
For example, if I’m playing Sharp Fangs Behind the Leaves, I know I’m focusing on Animal/Plant elements to boost my innate powers. Any card without at least one of those elements needs to offer something extraordinary to be worth consideration.
Next, I evaluate energy curve and card play limitations. This is where many players stumble. If you’re playing a spirit like Shifting Memory of Ages with strong energy generation but limited card plays, high-cost cards become more attractive. Conversely, if you’re River Surges in Sunlight with lots of card plays but tight energy, prioritize efficient lower-cost options.
I learned this lesson the hard way in a game where I was playing Bringer of Dreams and Nightmares. I grabbed two expensive Major Powers early, thinking I’d just reclaim more often. By mid-game, I was constantly energy-starved and watching my board position deteriorate while my expensive cards sat unplayed in my hand.
The third consideration is your current tactical needs. Are Dahan being decimated? Are coastal lands overrun? Is blight spreading in a particular pattern? The right power card can address immediate problems while still supporting your long-term strategy.
I remember a game where I was playing Keeper of the Forbidden Wilds against England level 5. By turn three, I had a critical jungle land about to blight cascade. I chose a Minor Power that could immediately address that threat, even though it wasn’t perfect for my element strategy. Sometimes survival trumps optimization.
Now for the actual evaluation method. For every power card offer, I mentally assign values to these factors:
1) Element alignment (0-3 points): How many elements match my focus? Will this help trigger innate powers?
2) Energy efficiency (0-2 points): Can I reasonably play this card regularly, or will it sit in my hand?
3) Tactical utility (0-2 points): Does this solve an immediate problem on my board?
4) Range compatibility (0-1 point): Can I target where I need to without presence placement gymnastics?
5) Thematic synergy (0-2 points): Does this amplify what my spirit is already good at?
Add these up, and anything scoring 7+ is usually an auto-pick. Scores of 5-6 are situational, and below that is typically a pass unless I have very specific plans.
This might sound mechanical—it’s not how I experience it during play. After dozens of games, this evaluation happens almost instinctively. But breaking it down helps explain the thought process.
Let me walk through an example. Last weekend, I was playing Serpent Slumbering Beneath the Island. Early game, I was offered “Poisoned Land” as a Minor Power. My evaluation:
Elements: Earth/Plant (matches two of my key elements) = 2 points
Energy: 1 cost (very affordable) = 2 points
Tactical utility: Slow damage power when I needed immediate defense = 0 points
Range: Sacred site requirement (workable but restrictive) = 0 points
Thematic synergy: Slow destruction fits Serpent’s gradual awakening = 2 points
Total: 6 points—borderline, but I took it because I knew my energy would be tight early and the elements were perfect.
For Major Powers, the calculation shifts slightly. The threshold is higher because of the sacrifice involved. I rarely take a Major that scores below 8 in my framework, unless I’ve hit a desperate situation where only a specific effect will save me from defeat.
The evaluation also changes as the game progresses. In early rounds, element matching and energy efficiency carry more weight. By mid-game, tactical utility often becomes paramount as you’re responding to the invaders’ spread patterns. Late game, you might prioritize powers that help achieve specific victory conditions.
One more thing—your powers should complement your fellow spirits. In a recent game, I was Ocean’s Hungry Grasp playing alongside Stone’s Unyielding Defiance. I deliberately chose powers that could push invaders into coastal lands, knowing Stone could handle inland defense. Our powers meshed beautifully, and we won handily against a level 6 adversary.
This framework isn’t infallible. Spirit Island has too many variables and combinations for any single approach to work 100% of the time. But it has dramatically improved my decision-making, especially in those high-pressure moments when you’re facing a Major Power decision that could make or break your game.
I still make mistakes. Just last week, I chose “Indomitable Claim” with Thunderspeaker, forgetting that my presence distribution wouldn’t let me target the crucial inland mountains where I needed control. My son Alex (who’s getting annoyingly good at this game) didn’t hesitate to point out my error as England ravaged exactly where I couldn’t defend.
The beauty of Spirit Island is that even after 150+ games, I’m still discovering new interactions and refining my approach. Each spirit brings unique considerations to power selection, and each adversary forces you to adapt your priorities. The framework I’ve outlined is a starting point, not a rigid formula.
So next time you’re staring at those four Minor Power options or contemplating a Major Power that would force you to forget a card, take a moment. Consider your elements, your energy curve, your tactical needs, your presence placement, and your spirit’s natural strengths. The right choice might not be the flashiest card—but it will be the one that lets your spirit sing.
I still remember the moment I realized Splendor wasn’t the simple set collection game I’d initially dismissed it as. It was during a weekend getaway to a cabin in northern Wisconsin, sometime in 2015. We’d brought a handful of games, and Splendor made it to the table mostly because it was compact enough to fit in my already overstuffed backpack. Four games later, I was scribbling notes on the back of a gas station receipt, trying to articulate the cascading efficiency patterns I was starting to see emerge.
After approximately 300 games (yes, I’ve kept track—Linda says it borders on compulsive), I’ve developed what I call “milestone acceleration mapping”—a framework for understanding how different resource priorities create dramatically different engine development curves. The fascinating thing about Splendor is that it’s not merely about collecting cards and gems; it’s about creating precise timing breakpoints where your engine suddenly jumps from one efficiency tier to another.
The core insight that transformed my approach was recognizing that in Splendor, the primary constraint isn’t the availability of resources—it’s the number of turns required to convert those resources into victory points. Every decision should be evaluated not based on immediate point gain, but on how it affects your turns-to-victory calculation.
Let me break this down with some practical examples from our regular game sessions.
First, let’s talk about what I call “discount curve acceleration.” Many players approach the early game with a simple heuristic: grab whatever gems seem most valuable for immediate card purchases. This creates a linear development pattern where your engine grows steadily but predictably.
Instead, I recommend a deliberate focus on creating discount patterns that compound. This means prioritizing tier 1 cards not based on their point values (which are minimal anyway) but on how their discount colors align with tier 2 cards you can spot in the display or anticipate based on the distribution of the deck.
During a family game night last winter, I demonstrated this approach with painful clarity (at least, painful for everyone playing against me). I began by focusing exclusively on white and blue discounts from tier 1, ignoring green entirely despite its abundance in the display. By turn 7, I had three white and two blue discount cards, allowing me to purchase tier 2 cards without collecting any additional gems. By turn 12, I was acquiring tier 3 cards while my opponents were still struggling to bridge from tier 1 to tier 2. The final score wasn’t even close.
Temperature seems to affect strategic decision-making in curious ways—I’m not making this up! During summer game nights on Derek’s patio, players consistently make more aggressive, short-term optimization choices compared to our winter sessions in my heated basement. Something about physical comfort apparently influences time-horizon preferences. We’ve started factoring this into our strategy, slightly adjusting expectations for opponent behavior based on playing conditions.
The most powerful engine-building pattern in Splendor involves what I call “milestone leapfrogging.” Rather than viewing the tiers as separate development phases, I identify specific card combinations that allow bypassing entire portions of the traditional progression path.
My wife Linda has mastered this technique to a frightening degree. In our most recent game, she focused exclusively on collecting emerald and diamond discounts in tier 1, completely ignoring sapphires despite their abundance. This seemed counterintuitive until turn 8, when she revealed her strategy by purchasing two tier 2 cards in consecutive turns that gave her precisely the combination of discounts needed to acquire a 4-point tier 3 card without any additional gem collection. She essentially “leapfrogged” over the normal development curve, creating a victory point acceleration that none of us could match.
Noble targeting adds another fascinating dimension to strategic planning. Many players treat nobles as bonus objectives to be claimed if convenient. This fundamentally misunderstands their strategic value. At 3 points each, nobles represent almost 20% of the typical winning score in a 4-player game, making them not optional bonuses but essential components of any efficient victory path.
The key insight regarding nobles is what Josh calls “the minimum viable path” approach. Rather than haphazardly collecting discount cards and hoping to qualify for nobles eventually, calculate the exact minimum combination of discount cards needed to claim specific nobles, then build your acquisition strategy around that precise target.
During a particularly competitive game against some friends from my systems analysis job, I employed this technique to claim two nobles by turn 12—acquiring exactly three cards each of the colors required and not a single extra discount that didn’t contribute to a noble qualification. This hyper-efficient pathing meant I “wasted” no turns on discounts that weren’t directly advancing my noble strategy.
Reserve actions create yet another strategic dimension that many players underutilize. The obvious application is reserving cards you want before opponents can take them, or securing wild gold gems when you need that specific resource. But the more sophisticated application involves what Derek has termed “development curve shaping”—using reserves to create guaranteed future efficiency breakpoints.
This means sometimes reserving cards that you won’t purchase for several turns, but that represent critical components of your eventual discount pattern. By securing these key cards early, you reduce the uncertainty in your development timeline and can plan subsequent turns with much higher precision.
Last month, I demonstrated this concept in a game against Josh and two of his friends from college. On turn 3, I reserved a tier 2 card that I wouldn’t be able to purchase until at least turn 6 or 7. This seemed premature, but that specific card was the lynchpin in a discount pattern that would eventually allow me to purchase tier 3 cards for just 1-2 gems each. When I finally executed this strategy on turn 9, I was able to acquire two tier 3 cards in consecutive turns, jumping from 5 points to 13 points in just two actions.
The randomness of the card display introduces an interesting risk management element to long-term planning. Rather than committing absolutely to a single color strategy, I’ve found success with what I call “flexible pathing”—identifying multiple potential development routes based on the initial card display, then remaining adaptively focused as the game evolves.
In practice, this means starting with a primary color strategy but maintaining awareness of how your discount pattern could pivot if certain key cards appear. Sometimes shifting from your initial plan to capitalize on an unexpected opportunity creates more efficiency than stubbornly adhering to your original strategy.
During a game at a local convention last year, I began with a clear focus on red and white discounts. But when two high-value green tier 2 cards appeared in the display simultaneously on turn 5, I recognized the opportunity to pivot. By shifting to incorporate green into my strategy, I was able to create an unexpected efficiency spike that accelerated my development curve beyond what my original plan would have allowed.
The gem supply limitations in different player counts drastically change optimal strategies. In 2-player games, where gem scarcity is rarely an issue, discount acceleration becomes paramount. In 4-player games, where specific gems are frequently depleted, gem acquisition timing and reserve actions take on much greater importance.
I’ve tracked outcomes across dozens of games at various player counts, and the data is clear: the winning strategy in 2-player games typically involves aggressive discount building with minimal gem collection, while 4-player winners usually employ more balanced approaches that account for resource contention.
My buddy Tom has developed what he calls the “tier skipping threshold” concept—identifying precisely how many discount cards of each color are needed before you can realistically begin ignoring tier 1 cards entirely and focus on tiers 2 and 3. Through extensive gameplay analysis, we’ve determined this threshold typically sits at 4-5 discount cards, with the specific combination depending on their color distribution.
One counterintuitive strategy I’ve found surprisingly effective is what I call “false signaling.” Since experienced players constantly observe which gems their opponents collect to deduce their strategies, deliberately collecting a gem color you don’t actually need can sometimes cause opponents to avoid cards you secretly want. This psychological misdirection can be particularly powerful in the early game when development patterns aren’t yet clearly established.
In a recent family game, I made a show of collecting blue gems in my first two turns, leading Linda to focus elsewhere despite blue being one of her target colors. This created an opening for me to quietly pivot to my actual strategy (red/green discounts) while she focused on competing with Josh for white cards. By the time my true objective became clear, I had already established a significant efficiency advantage.
The spatial arrangement of the card display creates interesting tactical considerations as well. Cards in the rightmost positions of each tier have been available longer, suggesting they’re less desirable to other players. However, this creates an opportunity—sometimes these “passed over” cards are actually powerful options that simply didn’t fit other players’ strategies but might perfectly complement yours.
I’ve developed a habit of quickly assessing these rightmost cards first, often finding unexpected synergies that other players have overlooked in their focus on the freshly revealed leftmost options. On multiple occasions, these overlooked cards have provided precisely the discount combination I needed to create a development breakthrough.
Understanding the probability distributions within the three card tiers adds another layer to strategic planning. Tier 1 has a relatively balanced color distribution, tier 2 skews slightly toward certain combinations, and tier 3 has distinct patterns of both colors and point values. This knowledge lets you calculate the approximate likelihood of finding specific cards you need as the display refreshes.
After hundreds of games across multiple play groups, I’ve concluded that Splendor is fundamentally a game of development curve manipulation. The gems, cards, and nobles are simply different tools for shaping that curve. The player who most effectively creates efficiency spikes—moments where their engine suddenly jumps to a higher functional tier—almost always wins.
So the next time you’re staring at that initial card display, resist the temptation to simply grab the most immediately useful gems. Instead, look for the patterns that create compounding efficiency, the discount combinations that enable milestone leapfrogging, and the precise noble qualification paths that minimize wasted actions.
Because in the world of Renaissance gem merchants, true wealth doesn’t come from collecting the shiniest stones—it comes from creating an engine of acquisition so efficient that your competitors are left wondering how you possibly accumulated so much so quickly. That’s the true splendor of this deceptively simple game.
My gaming group has a standing joke about my “Imperial efficiency” whenever we play Star Wars: Rebellion. It started three years ago when I managed to find the Rebel base on turn two—a combination of good deduction and, frankly, dumb luck that I’ve never replicated since. But Jeff and Tony still give me suspicious looks whenever I reach for the Imperial faction tiles, as if I’ve got some dark Force power that helps me hunt down Rebels.
Truth is, finding that hidden base is part science, part art, and yes, occasionally blind luck. After 40+ games (heavily weighted toward playing as the Empire because, let’s face it, nobody in my group wants to be the bad guys except me), I’ve developed a methodical approach that consistently narrows down the search area by mid-game. It’s not foolproof—a clever Rebel player can still misdirect and delay—but it’s far better than the random probe droid deployments I see many Imperial players resort to.
So, I’m sharing my process. Not because I want more efficient Imperials out there (Rebel players, you might want to stop reading now), but because a well-played cat-and-mouse game makes Rebellion sing. Nothing’s worse than an Imperial player who can’t find the base or a Rebel who gets discovered immediately.
First principle: the base location is almost always a strategic choice, not a random one. Good Rebel players select their hideout based on specific criteria—distance from Imperial starting systems, access to resources, proximity to systems they want to subvert early. Understanding these motivations immediately narrows your search.
In our regular group, Linda (my wife) almost always places the Rebel base in a system that’s exactly two jumps away from a starting Imperial system. Not one (too dangerous) and rarely three (too remote from early mission opportunities). Knowing this, I can immediately eliminate large portions of the board in our games. Your own opponents will have their patterns—watch for them.
Second principle: probe droid action efficiency trumps all. New Imperial players make the mistake of spreading probe droids across the galaxy randomly. Bad move. Every probe action should eliminate multiple potential hiding spots, preferably an entire region. I’ve developed what I call the “quadrant method” for this.
Mentally divide the galaxy into four rough quadrants. Your first probe droid should target the most system-dense quadrant, but not randomly. Choose a central system that will reveal the maximum number of adjacent systems. If you find nothing, you’ve just eliminated perhaps a quarter of the board with one action. Your next probe similarly targets the center of the second-densest remaining quadrant.
This might sound obvious, but I’ve watched countless Imperial players waste actions by probing one system at a time without a coherent pattern. The math simply doesn’t work—you’ll run out of turns before finding the base.
My friend Charlie (who’s scary-good as the Rebels) once told me after a game: “I knew you wouldn’t find me because you wasted your first three probe droids on systems that only revealed two other systems each.” He was right, and I’ve never made that mistake again.
Third principle: fleet movement is part of your search strategy. Many Imperial players treat fleet movement as separate from probe droid deployment—a mistake that costs precious actions. When moving your Star Destroyers for tactical reasons, always position them to reveal systems you haven’t checked yet. Sometimes revealing a single strategic system through fleet movement is better than a probe droid action that would reveal that same system plus one more, if the fleet movement also accomplishes other objectives.
This doesn’t mean rushing Star Destroyers to the edges of the galaxy on turn one. But it does mean being thoughtful about which systems you move through. I track every system I’ve revealed through any means, and always look for movement paths that uncover new possibilities.
My most effective searches combine these principles into a “constricting net” approach. I start with broad probe droid sweeps that eliminate whole regions, then use fleet movement to check questionable systems while establishing presence in likely target areas. As the game progresses, I deploy more targeted probe droids in the remaining likely regions.
Let’s talk about timing. The most common mistake I see is Imperial players getting distracted by early Rebel provocations. Yes, that Rebel attack on Corellia is annoying, but if you divert your probe droids to chase Rebel forces, you’re playing into their hands. The first three turns should focus almost exclusively on methodical searching unless absolutely prevented.
I’ve developed a rough timing guide:
– Turns 1-2: Broad elimination of regions
– Turns 3-4: Targeted searching in likely areas
– Turns 5+: Surgical precision based on all available intelligence
But how do you determine “likely areas” after your initial broad sweeps? This is where the art comes in. Beyond looking for patterns in your specific opponents’ choices, there are general tendencies worth noting:
Rebel players often choose systems with planets that offer mission icons they want to leverage early. If you notice early Rebel missions focusing on gaining Diplomacy icons, look for systems with planets offering those icons. If they’re building units rapidly, they might be near production icons.
Remote systems are attractive to beginners but rarely chosen by experienced players. Why? Because while they’re harder to find, they also limit the Rebel player’s early options. The most dangerous Rebel bases are those in mid-tier systems that balance security with operational flexibility.
Pay attention to timing of Rebel movement too. If Rebel forces suddenly appear in a region you haven’t searched yet, around turn 3 or 4, that’s often a misdirection. The base is probably elsewhere. But if Rebel ships start appearing in a region around turn 5 or 6, they might be getting desperate and moving to defend their base.
One counterintuitive approach I’ve found effective: sometimes I deliberately delay probing systems where I strongly suspect the base might be. This seems crazy, but hear me out. If I find the base too early, the game shifts immediately to an assault I might not be prepared for. By focusing first on systems I’m confident do NOT contain the base, I can build up my forces while narrowing the search area. When I finally do check my prime suspects, I’m ready to strike immediately.
My most effective game using this approach was against my son Alex, who’s become frustratingly good at Rebellion. I had narrowed his base to one of three systems by turn 4 but didn’t probe any of them. Instead, I amassed a tremendous fleet nearby while continuing to check obviously wrong locations. By turn 6, I was ready, found his base with my first targeted probe, and launched an overwhelming assault he couldn’t counter.
The look on his face was worth every deliberately wasted probe droid.
Of course, probe cards and captured Rebel operatives can dramatically accelerate your search. But I find it’s better to build a strategy assuming you won’t get lucky with these, then treat them as fortunate accelerants when they do appear.
My final piece of advice might be the most important: maintain a physical or mental map of eliminated systems. The game state gets complex, missions are happening, fleets are moving, and it’s shockingly easy to forget which systems you’ve already cleared. I use a simple notation system on a piece of paper, but even just mentally rehearsing “these systems are clear” after each turn helps.
I once lost a game I should have won because I forgot I’d already cleared Dantooine through fleet movement on turn 2, then wasted a probe droid confirming it on turn 5. That single wasted action delayed finding the base by one critical turn.
Finding the Rebel base in Star Wars: Rebellion isn’t just about luck or even game mechanics—it’s about understanding human psychology and decision-making patterns. The best searches combine methodical elimination with insight into your specific opponent’s tendencies. Master these aspects, and you’ll have Rebels on the run consistently.
Just don’t tell my gaming group I shared these tips. I still enjoy the reputation of having mysterious Imperial powers when we play.
The first time I completely misjudged coalition alignment in Pax Pamir, I paid for it dearly. It was during my fourth game, playing with Linda and our friends Pete and Sarah. I’d spent the early game building a strong Afghan presence, establishing a respectable network of tribesmen and roads across the map. When the British suddenly surged in the mid-game, I hesitated, stubbornly clinging to my Afghan loyalty for two crucial turns longer than I should have. By the time I finally shifted allegiance, the opportunity had passed—Sarah had already established dominance within the British coalition, and my late arrival left me as a minimal contributor to their success. When the dominance check hit, I watched helplessly as she claimed the victory that could have been mine with more timely political maneuvering.
“The Great Game waits for no one,” Pete remarked as we packed up, a maddeningly accurate assessment of my failure. That painful experience taught me one of Pax Pamir’s most crucial lessons: in the shifting political landscape of 19th century Afghanistan, timing is everything. Having now played 30+ games (I’ve kept meticulous count in my game journal), I’ve developed what I think is a reasonably sophisticated understanding of coalition alignment timing that has transformed my approach to the game’s central strategic challenge.
My gaming group has a running joke about my “Pamir paranoia”—the way I obsessively count and recount coalition blocks and cards whenever a dominance check appears in the deck. “David’s tallying the political winds again,” Linda will announce when she notices that particular expression of concentration. They tease, but that careful evaluation of coalition strength has saved me from numerous potential alignment disasters. In a game where victory often depends on being with the right coalition at precisely the right moment, there’s no such thing as excessive awareness.
The fundamental principle that guides effective coalition alignment in Pax Pamir is what I call “momentum recognition”—identifying when a coalition is building strength before it becomes obvious to everyone at the table. This predictive awareness requires looking beyond the current board state to understand how market cards, player tableaus, and revealed dominance checks are likely to shift political power in the near future. The players who consistently succeed aren’t those who align with the currently strongest coalition, but those who position themselves with coalitions poised for imminent growth.
This principle of momentum recognition crystallized for me during a game where the Russian coalition had dominated the early proceedings, with all players save one maintaining Russian loyalty. Just before a dominance check appeared in the market, I noticed that the upcoming cards included several British personalities and events. Rather than following conventional wisdom and aligning with the presently dominant Russians, I pivoted to British loyalty a full turn before anyone else recognized the shifting winds. When the dominance check eventually triggered, the British had surged to parity with the Russians, and my early alignment gave me predominance within the British faction. That single well-timed pivot transformed what would have been a mediocre position into a commanding victory.
The dominance check timing creates fascinating strategic considerations for coalition alignment. With exactly four dominance cards in the deck (in the second edition), each representing a quarter of the game’s progression, experienced players can roughly anticipate when these critical moments will arrive. This awareness creates natural decision points for coalition evaluation, with alignment shifts typically most valuable shortly before dominance checks rather than immediately following them.
I’ve found that the optimal timing for coalition reassessment follows a fairly predictable pattern across most games. The first dominance check often arrives before clear coalition dominance emerges, making initial loyalty less critical than many new players assume. The second check typically occurs when at least one coalition has established significant board presence, creating the first truly consequential alignment decision. The third and fourth checks usually determine the final outcome, with alignment shifts during this period requiring careful calculation of both immediate scoring potential and positioning for subsequent checks.
This timing framework emerged clearly during a series of games with our regular Tuesday group. In our early plays, we frequently shifted coalitions reactively, responding to the current strongest faction immediately after dominance checks. With experience, we collectively evolved toward more predictive alignment shifts, often pivoting a full turn or even two before dominance cards appeared. This proactive approach proved substantially more effective, as it allowed players to establish stronger positions within their new coalitions before the critical scoring moments arrived.
The cost of loyalty shifts creates interesting economic tensions that inform optimal alignment timing. Each shift requires discarding cards matching the new coalition, creating a resource investment that must be balanced against the potential benefits of realignment. I’ve found that successful players treat loyalty not as a matter of game-long commitment but as a strategic resource to be invested when the political return justifies the economic cost.
My friend Sarah, who approaches games with remarkable analytical clarity, developed what she calls her “coalition calculus”—a mental framework for evaluating whether a loyalty shift represents positive expected value. She considers factors like the current market, upcoming cards if visible, strength of existing coalition positions, and her own tableau development. This systematic approach to alignment decisions has served her well, resulting in impeccably timed political pivots that frequently position her for dominance within ascendant coalitions just before critical checks.
The ripple effects of loyalty shifts across multiple players creates another layer of strategic consideration. When one player changes allegiance, it not only affects their position but potentially alters the relative strength of every coalition and the standing of all players within them. This interconnected nature of alignment decisions means that optimal timing sometimes depends not just on your own tableau and the general board state, but on anticipating how other players are likely to react to changing political winds.
I witnessed a perfect example of this ripple awareness during a game with Pete, whose strategic thinking in Pax Pamir approaches master level. When the British coalition began showing signs of growth, several of us considered switching allegiance. Pete, however, deliberately maintained his Russian loyalty despite the seemingly obvious British momentum. His calculation, as he explained afterward, was that if everyone shifted to British alignment, the Russian coalition would be dramatically weakened, leaving him as the primary beneficiary of any remaining Russian strength. This contrarian positioning proved brilliantly effective when the ensuing dominance check revealed a Russian coalition severely diminished but still viable, with Pete as its uncontested leader.
The market deck composition creates important timing considerations for coalition alignment. As cards are purchased and discarded, the relative frequency of different coalition cards in the remaining deck shifts, altering the probability of favorable cards appearing for each faction. Tracking these evolving probabilities provides valuable insights into which coalitions are likely to gain momentum in upcoming turns.
During a particularly competitive three-player game, I noticed that an unusually high number of Afghan cards had already been removed from the deck through various mechanisms. Recognizing that this would limit Afghan growth potential in the latter half of the game, I pivoted away from my initial Afghan loyalty despite having a reasonably strong position. This deck composition awareness proved decisive when subsequent market rows revealed predominantly Russian and British cards, leaving the Afghan coalition without the reinforcements needed to maintain competitiveness through the final dominance checks.
The specific timing of when to maintain divided loyalty—having patriots and court cards from multiple coalitions—versus when to commit fully to a single faction creates interesting strategic tensions. Divided loyalty provides flexibility for future pivots but reduces your immediate impact within any single coalition. I’ve found that the optimal approach typically involves maintaining some division in the early and mid-game while consolidating toward single-coalition focus as the final dominance checks approach.
My colleague Jim, who approaches games with remarkable mathematical precision, coined the term “loyalty liquidity” to describe this strategic flexibility. In the early game, he purposefully develops a tableau with cards from at least two coalitions, even at the cost of some efficiency. This political flexibility allows him to pivot quickly when coalition momentum shifts, often enabling him to establish dominance within emerging factions before other players can effectively respond. As the game progresses toward its conclusion, he gradually consolidates toward his assessment of the ultimately dominant coalition, trading flexibility for maximum impact within his chosen faction.
The specific court cards available to each coalition create another dimension of timing considerations. Some coalitions may temporarily lack cards providing critical actions like tax collection or military operations, creating windows of opportunity where aligning with seemingly weaker factions offers disproportionate strategic advantages. Recognizing these temporary action imbalances helps identify optimal moments for coalition pivots that might appear counterintuitive based solely on block count or board position.
During a game where the Russians had established early dominance, I noticed that the available Russian court cards offered limited economic actions, while the weaker British coalition had access to cards with powerful tax and gift capabilities. Rather than following the obvious path of Russian alignment, I shifted to British loyalty specifically to access these economic engines. This temporary economic advantage allowed me to develop my tableau more efficiently than my Russian-aligned opponents, ultimately positioning me to pivot back to Russian loyalty (if necessary) from a position of greater strength. The lesson was clear—coalition value depends not just on current board strength but on the specific capabilities available to each faction at a given moment.
The geography of the Pax Pamir map creates regional considerations that influence optimal coalition timing. Some areas naturally favor certain coalitions due to starting positions or border proximity, making alignment shifts more or less valuable depending on your established geographic presence. I’ve found that successful players factor these spatial relationships into their alignment decisions, sometimes maintaining loyalty to seemingly weaker coalitions when their geographic position creates disproportionate local advantages.
This geographic sensitivity became apparent during a game where my tableau had established strong presence in Transcaspia and Persia—regions where Russian influence was particularly valuable due to border access. Despite the British coalition showing greater overall strength, I maintained Russian loyalty longer than might have seemed optimal based purely on coalition block count. This regionally-informed decision proved effective when the Russians leveraged their geographic advantage to surge back into contention, with my established position in key territories making me the primary beneficiary of their resurgence.
The impact of specific event cards on coalition strength creates crucial timing windows for alignment shifts. Cards like “Political Collapse” or “Uprising” can dramatically alter the balance of power, creating sudden opportunities for well-positioned players to capitalize on coalition transitions. Tracking these high-impact events as they move through the market provides valuable signals for potential alignment adjustments before these shifts become obvious to all players.
I recall a particularly dramatic game where the powerful “Military Collapse” event appeared in the market just before a dominance check. Recognizing that this would significantly weaken the dominant Russian coalition if purchased, I pivoted to British loyalty a full turn before the event was claimed. When the military collapse eventually devastated Russian army presence, the British emerged as the strongest faction, with my early pivot giving me superior position within their coalition. This anticipation of event-driven coalition shifts represents one of the subtler aspects of alignment timing that separates experienced players from novices.
After all these games and all this analysis, perhaps the most important insight I’ve gained about coalition alignment in Pax Pamir is that optimal timing isn’t about rigid formulas or perfect predictions, but about maintaining constant awareness of the evolving political landscape while positioning yourself to capitalize on momentum shifts before they become obvious to everyone at the table. The players who consistently succeed aren’t those who follow a predetermined strategy or react to the current strongest coalition, but those who sense political currents one or two turns before they manifest in dominance checks.
I still occasionally misjudge coalition trajectories or pivot at suboptimal moments. But those mistakes have become rarer as I’ve developed a more intuitive understanding of how market composition, player tableaus, and board geography interact to create the ebbs and flows of coalition strength. There’s something deeply satisfying about perfectly timing a political realignment, watching as your carefully calculated pivot positions you for dominance within an ascendant faction just as a critical check arrives.
And really, isn’t that calculated opportunism exactly what the historical Great Game was all about? The shifting loyalties and pragmatic alliances that characterized 19th century Afghan politics find perfect expression in Pax Pamir’s coalition mechanics, rewarding players who embody the political cunning of the era’s most successful powerbrokers. Now if you’ll excuse me, I need to go convince Linda that we absolutely need to play “just one more quick game” before bed. I have a theory about early Afghan positioning that I’m dying to test.
I’ve always had a sweet spot for trick-taking games. It probably started with endless rounds of Hearts with my grandparents during summer vacations, where my grandmother routinely destroyed us all while maintaining her innocent smile. But The Crew: Mission Deep Sea has taken my appreciation to another level entirely. After 94 logged plays (yes, I keep track—my wife Linda finds this somewhere between amusing and concerning), I’m convinced it’s the most elegant design in the genre.
The cooperative twist fundamentally changes the trick-taking dynamic in ways that still surprise me, even after dozens of missions. In traditional trick-taking games, you’re primarily focused on your own hand. In The Crew, you’re constantly thinking about everyone else’s potential cards and how to choreograph the perfect sequence of tricks across the entire team.
My regular gaming group initially struggled with the transition. Jeff, who’s a shark at traditional trick-taking games, kept trying to win every trick he could out of pure muscle memory. “It’s not about winning tricks,” I kept reminding him. “It’s about winning the right tricks.” By mission 15, he’d finally rewired his brain for cooperative play, and our success rate jumped dramatically.
The core insight that transformed our play was realizing that hand management in The Crew isn’t just about your current trick—it’s about planning a sequence of tricks that might span the entire round. I’ve developed what I call the “Four-Horizon Planning” approach that has taken our crew from frustrating failures to consistent success on even the toughest missions.
The first horizon is the current trick. This is obvious—what card should you play right now? But unlike traditional trick-taking games where you might play conservatively to avoid taking a trick with points, here you’re thinking: “Does anyone need to win this specific trick?” If so, how do we ensure they win it?
I still remember the breakthrough moment when this clicked for our group. We were on mission 23, and Tony needed to take a trick containing the pink 7. He led with a yellow card, and around the table, we all played our lowest yellows, allowing him to win with a modest yellow 6. It wasn’t about playing our best strategy for that isolated trick—it was about ensuring Tony got exactly what he needed.
The second horizon is setting up the next trick. This is where The Crew starts differentiating skilled players from novices. You’re not just playing to the current trick but considering how your play impacts the next one. Sometimes the right move is deliberately losing a trick to retain control for the following one.
A perfect example happened in our game last week. I had the green 9 as a task card, but Alex had the green rocket (the highest green card). Rather than lamenting my bad luck, I recognized an opportunity. When Alex led with a blue card, I deliberately played a high blue to win the trick, which allowed me to lead the next trick with a green card that Alex couldn’t trump. By thinking one trick ahead, what seemed like an impossible task became straightforward.
The third horizon is mid-round positioning. This is about maneuvering the team into advantageous positions for the latter half of the round. Who should be left with the lead for trick 5? Who needs to be void in a particular suit by trick 4? These considerations might influence plays made in tricks 1 and 2.
In one particularly complex mission, we needed Kevin to take the pink 1 in the final trick. Early in the round, I deliberately played my high pink cards to ensure he’d have the only remaining pink card by the end. This required coordinated play from the entire team across multiple tricks—I’d call it a beautiful dance if that didn’t sound so pretentious, but honestly, that’s what it felt like.
The fourth horizon is complete round planning. Before a single card is played, look at the task distribution and envision the entire sequence of the round. Who needs to win early, and who needs to conserve certain cards for later? Sometimes the mission is impossible without a very specific sequence of tricks, and identifying that path before you start is crucial.
Our most satisfying victory came on mission 41, where we spent nearly five minutes in silent communication planning before anyone played a card. The mission seemed impossible at first glance, but by mapping out the entire round—who would lead which tricks with which suits—we found a narrow path to victory. Executing that plan perfectly, trick by trick, created a gaming moment I still think about months later.
Now, let’s talk about some specific hand management techniques that support these planning horizons:
Suit stripping is perhaps the most powerful technique in The Crew. By deliberately depleting a player of a particular suit, you can ensure they’ll be able to play trumps (or be forced to play trumps) at critical moments. I’ve found this especially useful for tasks requiring specific cards to be played together.
In a recent game, Linda needed to take the blue 3, but she had several blue cards higher than the 3. The solution? Alex and I systematically led high blue cards in early tricks, forcing her to play her higher blues. By the time I led the blue 3, she had the only remaining blue card—exactly the 4 she needed to capture it.
Trump management is equally critical. Unlike traditional trick-taking games where saving trumps for the end is often optimal, The Crew requires strategic use throughout the round. Sometimes burning your high trumps early is necessary to position the team correctly for later tricks.
I’ve noticed that inexperienced players tend to hoard their rocket cards (the highest trump in each suit), saving them for some imagined critical moment. But often, using a rocket early creates more opportunities than saving it. In mission 33, I deliberately played my pink rocket on the first trick to win the lead, allowing me to systematically lead suits that would help my teammates fulfill their tasks. Had I saved that rocket, our entire sequence would have been disrupted.
Communication timing is another crucial aspect of hand management. The limited communication in The Crew means you must extract maximum value from each opportunity. I’ve found that early communication about extreme cards (highest or lowest in a suit) provides the most actionable information for planning.
Our group has developed an informal understanding about communication: if someone uses their communication token in the first trick, the information is probably crucial for the entire round’s strategy. If they wait until mid-round, it’s likely relevant to a specific upcoming sequence. This meta-strategy has improved our coordination without breaking the game’s communication rules.
Lead management—controlling who has the lead at key moments—is perhaps the most sophisticated aspect of The Crew’s hand management. Sometimes ensuring a specific player wins trick 3 is essential not because they need that trick, but because they need to lead trick 4 for another player’s task to be completed.
In one memorable game, we needed to ensure Tony won a trick containing the green 4, but he had no green cards. The solution? I needed to have the lead at precisely the right moment when everyone else had played their green cards, allowing me to lead a suit Tony could trump. This required careful planning across multiple tricks to ensure I had the lead at exactly the right moment.
Card counting, a skill useful in many card games, takes on new importance in The Crew. Since you’re working together, tracking which cards have been played in each suit helps make informed decisions about when to use high cards versus when a lower card will suffice.
My friend Marcus has an uncanny memory for cards and often serves as our informal tracker. “There are two pinks higher than yours still out there,” he’ll mention casually, helping us avoid wasting high cards unnecessarily. Not everyone has this natural ability, but practicing basic tracking of key cards dramatically improves decision-making.
Let’s talk about a common mistake that undermines these strategies: premature trump usage. Playing trumps when unnecessary often destroys carefully laid plans. I’ve seen countless missions fail because someone trumped a trick “just to be safe” when their teammate actually needed to win it.
In our very first campaign, we failed mission 12 three times due to exactly this issue. Jeff kept trumping tricks to “help” when we didn’t need him to, disrupting our carefully planned sequence. The breakthrough came when he finally asked, “Should I assume you can handle your own tasks unless I hear otherwise?” That simple shift in mindset—trusting teammates to manage their own requirements—transformed our play.
Another critical error is failing to consider the implications of the task distribution. Before playing a single card, analyze who has which tasks. If someone needs to take three specific tricks, they’ll need the lead multiple times. If someone needs to take cards of the same color, they’ll likely need trumps or high cards in that suit.
In our most recent campaign, we implemented a pre-game ritual where we take 30 seconds just to study the task distribution before anyone touches their cards. This simple practice has prevented countless mistakes that come from focusing too narrowly on individual hands.
The beauty of The Crew lies in how it transforms the familiar trick-taking mechanism into a complex coordination puzzle. Each card play is a communication, each trick a step in an intricate dance. When it all comes together—when the team executes a perfect sequence where each player takes exactly the tricks they need in exactly the right order—it creates a gaming satisfaction that few other games can match.
After nearly a hundred missions, I’m still discovering new nuances to hand management in The Crew. Each new mission presents unique challenges that force us to adapt our strategies, preventing the game from ever feeling solved or routine. That’s the mark of truly exceptional design.
So next time you’re diving into the deep sea with your crew, remember: you’re not just playing cards—you’re orchestrating a sequence. Think beyond the current trick, coordinate your plays, and trust your teammates. The mission may seem impossible at first glance, but with proper hand management and forward planning, even the most daunting depths can be conquered.
The first time I played Tokaido, I completely misunderstood the pace of the game. I sprinted ahead like a tourist with a checklist, racing from inn to inn while the other players lingered at scenic viewpoints and hot springs. By journey’s end, I’d completed the route in record time and scored dismally, while my friend Mark, who’d taken his time at nearly every attraction, had nearly doubled my points. “It’s not about the destination,” he said with a somewhat smug smile as we tallied scores. “It’s about the journey.” A bit on the nose, perhaps, but he wasn’t wrong.
Sixty-something games later (I stopped keeping precise count after forty, though Linda insists it’s closer to seventy-five), I’ve developed what I think is a nuanced understanding of journey pacing in Tokaido. What initially appears to be a simple race or non-race turns out to be a delicate dance of timing, blocking, and opportunity cost evaluation that varies dramatically based on player count, traveler abilities, and the emergent landscape of the journey itself.
My gaming group has a running joke about my “Tokaido transformation.” According to them, I visibly shift from my normally analytical self to a more contemplative, almost zen-like state when we play. “David’s entered journey mode,” Pete will announce when he sees me examining the board with that particular expression. I can’t dispute the observation—there is something about Tokaido that encourages a different mode of strategic thinking, one that balances opportunism with patience in a way few other games require.
The fundamental principle that guides effective journey planning in Tokaido is what I call “value density”—understanding how many points each stop is likely to yield and how that value changes as the journey progresses. Certain locations, like panoramas, increase in value with each visit. Others, like farms, provide relatively consistent returns. And some, like encounters, vary wildly based on the specific cards available. Recognizing these patterns allows for more informed decisions about when to move quickly and when to linger.
This concept of value density crystallized for me during a game with our regular Wednesday group. I had been tracking my points-per-stop ratio and noticed that early farm visits were yielding about 3 coins (1 point) per stop, while completed panoramas in the later segments were worth 3-5 points per stop. This quantifiable difference in value density fundamentally changed my approach to early-game movement, making me less hesitant to sprint through lower-value regions when necessary.
The traveler-specific abilities in Tokaido create natural pacing tendencies that should inform your journey planning. Characters like Satsuki (who earns extra coins at farms) or Yoshiyasu (who gains additional encounter cards) benefit from visiting specific locations more frequently, while others like Hirotada (who starts with extra coins) have greater flexibility in their movement patterns. Aligning your pacing with your character’s strengths creates compounding advantages throughout the journey.
I remember watching my friend Sarah play as Kinko, whose ability to earn additional coins at villages creates a natural incentive to visit shops frequently. Rather than adjusting her pace to capitalize on this advantage, she moved at the same rate she would with any other character. When I asked about this afterward, she explained that she didn’t want to “seem predictable” by always stopping at villages. While I appreciated the meta-gaming attempt, the mathematics were clear—her character’s ability was worth approximately 5-7 extra points over the course of the game, an advantage she sacrificed for positional considerations that yielded no clear benefit.
The player count dramatically impacts optimal journey pacing in ways that aren’t immediately obvious. In a two-player game, the leading player will always move next, creating a rhythm where the player in back makes two consecutive moves before the leader moves again. This pattern allows for entirely different blocking and spacing strategies than in games with more players, where the movement dynamics become increasingly complex.
This realization hit me during a two-player game with Linda, where she consistently manipulated this movement pattern to deny me access to completed panorama sets. By carefully timing her moves to stay just behind me in key segments, she could essentially control my pace, forcing me to either skip valuable locations or move inefficiently to break the pattern. The resulting 12-point swing in panorama scoring made a decisive difference in the final tally, teaching me that pacing in Tokaido isn’t just about your own journey but about controlling your opponents’ rhythms as well.
The inn stops, which punctuate the journey at regular intervals, create natural segmentation that shapes pacing decisions. The compulsory nature of these stops, combined with the last-in-first-out turn order they establish, introduces fascinating tactical considerations about when to trigger these transitions. Being the last to arrive at an inn grants you first choice of meal and first movement after the break—advantages that can sometimes outweigh the benefits of visiting an extra attraction.
I’ve found that the optimal timing for inn arrival varies between the different segments of the journey. In the early game, maximizing attraction visits usually provides greater value than securing turn order. By the middle inns, however, the strategic advantage of moving first in the next segment often outweighs the marginal points from an additional stop, particularly if that movement priority allows access to high-value or limited-availability attractions immediately after the inn.
This tactical approach to inn timing became clear during a game where I deliberately rushed to the second inn, skipping two relatively low-value stops, to ensure I moved first in the third segment. This priority movement allowed me to claim the last hot spring space before another player could reach it, completing my set for maximum scoring. The four points I sacrificed by skipping attractions were more than offset by the seven-point hot spring completion bonus I secured through positional advantage.
The spatial distribution of different attraction types creates natural “value clusters” along the journey that should influence your pacing decisions. Recognizing these high-density regions and adjusting your speed to capitalize on them—slowing down when approaching valuable clusters and potentially accelerating through sparser sections—can significantly improve your overall scoring efficiency.
During a recent game, I noticed an unusual concentration of encounter and souvenir opportunities in the middle segment of the journey, with relatively fewer high-value stops in the second section. Rather than maintaining a consistent pace, I deliberately rushed through the second segment, accepting suboptimal points-per-stop in exchange for reaching the richer middle region before other players could claim the most valuable opportunities. This dynamic pacing adjustment resulted in one of my highest scores ever, despite looking somewhat haphazard to less experienced players.
The evolving landscape of the journey—how the board state changes as players claim locations and cards—necessitates continuous reevaluation of pacing strategies. What begins as a relatively open path becomes increasingly constrained, with certain attractions exhausted and others increasing in value as sets near completion. Effective journey planning requires not just initial strategy but adaptive reassessment as the route develops.
I witnessed a perfect example of this adaptive pacing during a game with my colleague Jim, who approaches Tokaido with almost mathematical precision. In the early segments, he moved deliberately, stopping at nearly every attraction. As the journey progressed and certain location types became scarce, he dramatically accelerated his pace to claim specific high-value stops before they disappeared, sometimes skipping three or four intermediate attractions to secure a crucial final panorama or hot spring. This willingness to shift gears based on evolving board conditions resulted in remarkably efficient scoring despite looking somewhat erratic to casual observers.
Blocking strategies—deliberately occupying spaces to deny others access—represents one of the more aggressive applications of pacing manipulation in Tokaido. While the game’s serene aesthetic might suggest otherwise, effective blocking through calculated movement can create significant scoring differentials, particularly when denying completion bonuses for collections or panoramas.
The effectiveness of blocking varies dramatically by player count. In a two-player game, blocking is a precise instrument, with clear sight lines to what your single opponent needs. With four or five players, blocking becomes more speculative, as the likelihood that any particular block will affect the player you’re targeting diminishes. I’ve found that in higher player count games, blocking should generally be opportunistic rather than the primary focus of movement decisions, while in two-player games, it can form the backbone of an effective strategy.
During a particularly competitive two-player game with my son Alex, I employed what he later described as “the most annoying blocking strategy ever.” Recognizing his focus on completing the mountain panorama, I deliberately paced my movement to claim each mountain view space just before he could reach it. The strategy required sacrificing several otherwise valuable stops on my part but denied him a potential 13-point panorama completion. The resulting frustration (“Dad, you’re not even trying to win, you’re just trying to make me lose!”) underscored the emotional impact effective blocking can have, though I maintain it was simply optimal strategic play.
Donation spaces present unique pacing considerations due to their diminishing returns mechanism. The first player to donate receives higher point values, creating an incentive for early visits that must be weighed against other opportunities. I’ve found that the optimal timing for donations varies significantly based on player count—in two-player games, securing the highest value donation quickly is often worth rushing for, while in four or five player games, the increased competition makes mid-journey donations more situationally valuable.
This donation timing insight emerged during a series of games with varying player counts. In our two-player games, Linda and I would frequently race for the first donation space, recognizing the substantial 3-point difference between first and second donations. In our regular four-player sessions, however, I noticed that the players who rushed to donations often sacrificed more valuable opportunities elsewhere, while more patient approaches yielded better overall results despite receiving slightly lower donation values.
The encounter deck’s changing composition throughout the journey creates another layer of pacing considerations. As encounters are drawn, the probability of receiving specific card types shifts, potentially increasing or decreasing the expected value of future encounter stops. Tracking these probability changes can inform more effective journey planning, particularly for characters with encounter-focused abilities.
My friend Rachel, who keeps mental track of cards with remarkable accuracy, uses this probabilistic approach to encounter timing with devastating effectiveness. During a memorable game, she deliberately delayed her encounter visits in the early journey, noting that several high-value encounter cards had already been drawn. In the final segment, when the deck had been refreshed with the reshuffled discard pile, she prioritized encounters and secured three particularly valuable cards that significantly contributed to her narrow victory. This demonstrated how awareness of deck composition can transform seemingly luck-based elements into strategic advantages.
The souvenir collection mechanism introduces interesting timing tensions between early purchasing for set completion and delayed purchasing for optimal selection. Moving quickly to souvenir shops in the early journey provides more time to complete sets but offers fewer choices at each stop. Conversely, patient purchasing later in the journey presents more options at each shop but provides fewer total opportunities to complete collections.
This purchasing timing dilemma became apparent during a game where I experimented with a deliberately delayed souvenir strategy. Rather than visiting shops at every opportunity, I waited until the middle segment to begin my collection, which allowed me to select specific items that would create completed sets with minimal redundancy. While I ultimately acquired fewer total souvenirs than Linda (who visited shops consistently throughout), my higher completion bonus for perfect set matching resulted in equivalent scoring with greater efficiency—a demonstration of how intelligent timing can sometimes outperform simple maximization.
The hot spring spaces present perhaps the clearest example of how value changes throughout the journey. With limited availability and set collection scoring, the value of each hot spring visit increases as you acquire more, making their timing particularly important. I’ve found that securing at least one hot spring in the early journey, regardless of other considerations, provides flexibility for more strategic timing decisions later when their point value potentially doubles or triples with set completion.
During a five-player game that featured unusually aggressive competition for hot springs, I observed how significantly timing affected their value. The player who visited hot springs opportunistically throughout the journey managed to collect three, scoring 9 points. Meanwhile, I focused on securing specific hot springs at key moments when I could complete a set, ultimately visiting only two but scoring 6 points—twice the per-visit efficiency through more deliberate timing.
The meal selection at inns introduces another timing element that interacts with journey pacing. Higher-cost meals generally provide better point-per-coin value but require accumulated wealth. This creates a tension between moving quickly to claim preferred meal options and moving slowly enough to accumulate sufficient coins for optimal purchases.
I’ve experimented with various approaches to this meal timing challenge and found that prioritizing at least one early farm visit before the first inn typically provides the necessary financial foundation for effective meal strategy throughout the journey. This insight crystallized during a game where I deliberately visited two farms before reaching the first inn, sacrificing a potentially valuable panorama stop in the process. The resulting coin advantage allowed me to purchase optimal meals at each subsequent inn, generating a surprising 5-point advantage in meal scoring alone by journey’s end.
Meta-game awareness—understanding how your regular playing partners approach the journey—can dramatically influence optimal pacing decisions. In our regular group, Pete typically rushes forward at every opportunity, while Sarah tends to linger at each valuable stop. Recognizing these tendencies allows for more effective positional play, sometimes deliberately breaking your optimal pattern to capitalize on predictable opponent movements.
During a game with our Tuesday night regulars, I noticed Mark consistently moving to create maximum distance from the player behind him—a pattern he’d displayed across multiple games. Recognizing this tendency, I deliberately remained close behind him in key segments, knowing he would likely accelerate to create separation, thus opening valuable stops for me that would otherwise have been claimed by other players. This meta-strategic awareness produced several high-value opportunities that wouldn’t have existed without understanding his characteristic pacing preferences.
After all these games and all this analysis, perhaps the most important insight I’ve gained about journey planning in Tokaido is that there is no universally optimal pace. The “correct” movement pattern emerges from the specific combination of traveler abilities, player count, board state, and opponent tendencies present in each unique game. What remains consistent is the need for deliberate, adaptive pacing that responds to the evolving landscape rather than adhering to fixed patterns.
I still occasionally find myself rushing too quickly through certain segments or lingering too long in others. But those missteps have become rarer as I’ve developed a more intuitive understanding of how value distributes across the journey and how timing affects opportunity access. There’s something deeply satisfying about executing a perfectly paced journey, where each stop feels like exactly the right choice at exactly the right moment.
And really, isn’t that the essence of what Tokaido is trying to simulate? The art of appreciating each moment while still reaching your destination with a collection of meaningful experiences. Now if you’ll excuse me, I need to go convince Linda that we absolutely need to play “just one more quick game” before bed. I have a theory about donation timing that I’m dying to test.
I can still vividly recall my first real “aha” moment with Race for the Galaxy. It was probably my seventh or eighth game, playing with Linda and our friends Steve and Rachel at our regular Friday night session. I’d been drafting cards that seemed individually powerful—a hodgepodge of military worlds, developments, and production planets—when Rachel laid down a sequence that began with Desperate Mercenaries, followed by New Military Tactics and drooped with Imperium Lords a couple of turns later. The synergy was immediately apparent as she rapidly expanded her tableau through military conquest while the rest of us struggled to keep pace with our more resource-intensive settlements.
“You’re not just playing good cards,” she explained after thoroughly trouncing us, “you’re building an engine where every card amplifies the others.” That insight completely transformed my approach to the game. Now, after 150+ plays (conservatively estimated—I stopped logging individual games years ago), I’ve developed what I consider a reasonably sophisticated understanding of the card synergies that create those specialized economy engines that separate the casual players from the serious contenders.
My gaming group has a running joke about my “Race face”—the particular expression I apparently make when I’m analyzing my starting hand, eyes slightly narrowed, head tilted just so. “David’s calculating card probabilities again,” Linda will announce to the table when she spots it. They tease, but that analytical approach has led to a win rate I’m rather proud of, though I wouldn’t dare mention the precise percentage for fear of never being invited to play again.
The fundamental principle that guides effective engine building in Race for the Galaxy is what I call “strategic coherence”—ensuring that every card in your tableau contributes to a unified economic approach rather than representing isolated points of value. This might seem obvious in retrospect, but I’ve watched countless experienced gamers fall into the trap of drafting “good cards” without considering how they integrate into their overall strategy, ending up with tableaus that are collections of strong individual cards rather than synergistic engines.
This coherence principle crystallized for me during a game where I’d drafted what seemed like powerful cards from three different strategic directions—some military worlds, a couple of production planets, and a few consume-focused developments. Despite having what appeared to be a strong tableau in terms of raw card count and diversity, I was soundly defeated by Pete, whose tableau was smaller but perfectly aligned around a production-consumption engine that generated both cards and victory points with remarkable efficiency. That game taught me that strategic focus almost always outperforms diverse “good stuff” approaches in Race for the Galaxy.
Starting hand evaluation establishes the foundation for your strategic direction and deserves careful consideration rather than reactive drafting. Those initial six cards often contain seeds of potential engines, and identifying which synergies to pursue versus which to discard shapes your entire game trajectory. I’ve found that successful players frequently discard seemingly powerful individual cards if they don’t align with their emerging strategic direction, prioritizing coherence over isolated efficiency.
I remember watching Steve’s approach evolve over several months of regular play. Initially, he struggled to discard any card with significant point value or powerful individual abilities. Over time, he developed the discipline to ruthlessly cull his hand of anything that didn’t contribute to his chosen engine type, even if that meant discarding six-cost developments or rare military worlds. His win rate improved dramatically with this more focused approach, demonstrating the value of strategic discipline in hand management.
The specialized economy engines in Race for the Galaxy broadly fall into a few archetypal categories: military conquest, produce-consume cycles, development chains, and exploration engines. While hybrid approaches can sometimes succeed, I’ve found that the most consistently powerful tableaus maintain clear focus on one primary engine type while incorporating supporting elements from others only when they directly enhance the core strategy.
This categorization became particularly useful during a tournament setting (yes, I occasionally play Race competitively, which Linda finds endlessly amusing), where I found myself facing opponents of varying experience levels. Against less experienced players, I could reliably succeed with a straightforward produce-consume strategy focused on generating consistent victory points each cycle. Against more sophisticated opponents, I needed to carefully observe their initial plays to identify their engine type, then either race to complete my engine faster or pivot to a strategy that specifically countered their approach.
Military conquest engines center around worlds that can be settled through military power rather than payment, supported by developments that either increase military strength or provide benefits for military worlds. The classic military engine begins with early military worlds like Rebel Outpost or Alpha Centauri, builds through mid-game military boosting developments like New Military Tactics or Imperium Cloaking Technology, and culminates in high-value military worlds like Rebel Freedom Fighters or Imperium Lords.
My most successful military engine came together during a game where my starting hand contained both Drop Ships and Contact Specialist. This combination allowed me to settle high-defense military worlds without needing additional military developments, accelerating my expansion phase significantly. By midgame, I had established enough military worlds to justify investments in Imperial Seat and Galactic Imperium, creating a tableau that generated substantial victory points from military settlements while my opponents struggled to establish their more resource-intensive engines. The key insight was recognizing that military engines are fundamentally about tempo—sacrificing some late-game point generation for rapid early expansion.
Produce-consume engines revolve around establishing production worlds that generate goods, paired with consumption powers that convert those goods into cards, victory points, or both. The most efficient produce-consume engines typically specialize in a specific good type, like Rare or Genes, with developments that provide bonuses for producing or consuming those specific goods. The ideal cycle creates a self-reinforcing loop where consumption powers generate resources that enable further expansion of production capacity.
During a particularly memorable game, I constructed what my gaming group now refers to as “the windmill”—a genes-focused production engine built around Alien Rosetta Stone World and Consumer Markets. This combination allowed me to produce and consume genes goods for both cards and victory points, creating an acceleration of resources that quickly overwhelmed my opponents’ more balanced approaches. What made this engine particularly effective was its focus on a single good type, which allowed me to maximize the efficiency of specialized consumption powers rather than diluting my tableau with different production types.
Development chains represent a distinct engine type that focuses less on cycles of production and consumption and more on creating cascading cost discounts that enable the rapid deployment of high-value developments. These engines typically begin with developments like Investment Credits or Development Team that reduce the cost of subsequent developments, creating chains that culminate in powerful six-cost developments like Galactic Federation or Pan-Galactic League.
My colleague Jim, who approaches games with remarkable strategic clarity, mastered this engine type before any of our regular group. While the rest of us were focused on traditional produce-consume cycles, he consistently constructed development-focused tableaus that seemed to explode with six-cost developments in the late game. The key insight he shared was prioritizing developments that specifically reduced costs for other developments, creating a snowball effect where each played development made subsequent ones incrementally more affordable. This approach sacrifices early-game point generation for devastating late-game scoring, often dropping multiple six-cost developments in the final rounds.
Exploration engines center around cards that manipulate the draw deck, provide bonuses for exploring, or offer benefits for specific card types drawn during exploration. While pure exploration strategies rarely succeed at high levels of play, exploration elements frequently support other engine types by providing the card flow necessary to find key engine components. Developments like Contact Specialist or Explorer Corps can transform exploration from mere card acquisition into a strategic advantage that fuels your primary engine.
During a game where the initial card distribution left me without clear direction, I pivoted to what began as an exploration-focused strategy built around Explorer Corps and Mining Conglomerate. The consistent card flow from exploration allowed me to identify and transition into a minerals production engine midgame, demonstrating how exploration can serve as both an early-game survival mechanism and a bridge to more focused strategies when your starting hand lacks clear synergies.
The pace of development creates interesting strategic considerations in engine construction. Some engines, particularly military conquest and exploration-focused approaches, prioritize rapid expansion of the tableau even at the cost of some strategic coherence. Others, like specialized produce-consume cycles or development chains, may progress more deliberately, prioritizing perfect synergy over raw tableau size. I’ve found that successful players adapt their pace to both their chosen engine type and the observed strategies of their opponents.
This pacing sensitivity became apparent during a series of two-player games with Linda, where we explored different engine types across multiple sessions. Her produce-consume engines consistently developed at a measured pace, carefully adding only planets and developments that enhanced her core strategy. My military-focused tableaus expanded more rapidly but sometimes suffered from reduced efficiency in the late game. Neither approach proved universally superior; rather, the optimal pace depended on both engine type and the specific cards available during each game.
The role selection mechanism in Race for the Galaxy creates another layer of strategic consideration for engine building. Beyond selecting phases that directly benefit your tableau, skilled players anticipate which phases opponents are likely to choose and construct engines that can capitalize on these “free” actions. Engines that can effectively piggyback on opponents’ role selections often gain significant efficiency advantages, essentially getting additional actions without spending selection opportunities.
My friend Rachel, who has perhaps the most intuitive grasp of game mechanics in our group, excels at this aspect of engine construction. Rather than building tableaus that function optimally when she selects specific phases, she deliberately creates engines that thrive regardless of which player selects which phase. Her produce-consume engines typically include develop abilities that activate during others’ development phases, and her military strategies incorporate production elements that generate goods when opponents select produce. This adaptable construction allows her engines to operate efficiently even when she’s focusing her own role selections on phases others might neglect.
Card counting and probability awareness represent more advanced aspects of engine construction that separate expert players from intermediates. With experience, you develop awareness of which key engine components remain in the deck, informing decisions about whether to pivot strategies mid-game or persist with your initial direction. While perfect tracking is impossible given the deck size, even approximate awareness of remaining card distributions can significantly inform strategic adjustments.
During a tournament game against particularly skilled opponents, I found myself with the beginnings of a rare elements production engine but missing key consumption powers to convert those goods into victory points. A less experienced player might have persisted with the production strategy, hoping to eventually draw appropriate consumption cards. Having played enough to roughly track card distributions, I recognized that most rare-specific consumption powers had likely already been drawn or discarded. This awareness prompted a strategic pivot toward a hybrid approach that incorporated military expansion alongside my existing production capacity, ultimately proving more successful than stubbornly pursuing an engine missing critical components.
The meta-game of Race for the Galaxy—how player tendencies and group dynamics affect strategic decisions—further complicates optimal engine construction. In groups where multiple players typically pursue military strategies, the competition for limited military worlds and developments may make production engines relatively more viable. Conversely, in groups where produce-consume cycles dominate, military approaches might face less competition for key cards. Recognizing these patterns allows for more effective engine selection based not just on card synergies but on expected competition for specific strategy types.
During a regular session with our Friday night group, I noticed that both Pete and Sarah had developed strong preferences for military-focused strategies over several weeks of play. Rather than competing directly for the same cards, I deliberately shifted toward a specialized development engine that could outpace their military expansions in the late game. This meta-strategic awareness proved more valuable than blindly pursuing what might have been marginally stronger synergies in my starting hand, demonstrating how understanding player tendencies can inform engine selection beyond pure card analysis.
The specific timing of transitioning from engine construction to victory point generation creates another strategic dimension in Race for the Galaxy. Early game focuses primarily on establishing engine components, mid-game on maximizing engine efficiency, and late-game on converting that efficiency into victory points. Recognizing the appropriate moment to shift from building to scoring separates experienced players from beginners, who often either score too early (before their engine reaches full potential) or too late (building past the point of diminishing returns).
My approach to this transition has evolved significantly over hundreds of plays. In early games, I tended to focus on engine building until the game-end trigger approached, often missing opportunities for mid-game point generation. With experience, I’ve developed a more nuanced understanding of when engines reach peak efficiency, typically transitioning to point generation when my tableau contains 9-12 cards depending on the specific engine type. This timing allows my engine to operate at near-optimal efficiency while maximizing the number of rounds available for converting that efficiency into victory points.
After all these games and all this analysis, perhaps the most important insight I’ve gained about engine building in Race for the Galaxy is that the perfect engine isn’t about incorporating every possible synergy, but about maintaining strategic coherence while adapting to the specific card distribution of each game. The players who consistently succeed aren’t those who rigidly pursue preset strategies but those who identify the strongest available synergies within their current card access and construct focused engines that maximize those specific interactions.
I still occasionally misjudge card probabilities or pursue synergies that prove less efficient than anticipated. But those mistakes have become rarer as I’ve developed a more intuitive understanding of how different card combinations interact to create economic engines. There’s something deeply satisfying about watching a well-constructed tableau click into perfect operation, each card amplifying the effects of others in a self-reinforcing cycle of efficiency.
And really, isn’t that elegant interaction between seemingly disparate parts what makes Race for the Galaxy so fascinating? The tension between specialization and adaptability creates decisions unlike any other game in my collection. Now if you’ll excuse me, I need to go convince Linda that we absolutely need to play “just one more quick game” before bed. I have a theory about Alien Research Team synergies that I’m dying to test.
The first time I formed an alliance in Rising Sun, I had absolutely no idea what I was doing. Four of us were gathered around my dining room table, the gorgeous miniatures arranged across the map of feudal Japan, and I impulsively offered my hand to Mark, saying, “Allies?” without any real strategic consideration. He accepted with a grin that should have warned me. Two seasons later, he’d leveraged our alliance to secure dominant positions in key provinces while contributing almost nothing to my strategic goals. When the inevitable betrayal came in the final season, he was positioned for a commanding victory while I scrambled for scraps.
“You have to think about what you’re actually getting from an alliance,” he explained afterward, seemingly genuinely concerned about my crestfallen expression. “It’s not just about having a friend.” That painful lesson kickstarted what has become a fascinating strategic journey across 40+ plays of Rising Sun, exploring the nuances of alliances that actually benefit both parties—at least until the moment they don’t.
My gaming group now jokes about my “alliance spreadsheets,” a good-natured exaggeration of how methodically I approach these temporary partnerships. “David’s calculating the exact numeric value of your friendship,” Linda will quip whenever I pause to consider an alliance offer. There’s some truth to the ribbing—I have become somewhat notorious for evaluating alliances with almost mathematical precision. But the results speak for themselves. I’ve yet to be on the receiving end of such a lopsided alliance since that first disastrous experience.
The fundamental principle I’ve discovered for successful alliance negotiation is what I call “complementary asymmetry”—identifying what each clan can offer that uniquely benefits the other without undermining their own position. The best alliances aren’t based on identical exchanges but on contributions that have different values to each player based on their clan abilities, board positions, and strategic objectives.
I learned this principle through repeated alliance failures where we attempted to divide benefits equally. During a memorable game with our regular Friday group, I formed an alliance with Sarah based on a straightforward “you take these provinces, I’ll take those” arrangement. It seemed fair on the surface but completely ignored the fact that her Lotus Clan gained substantially more from controlling my assigned territories due to their harvesting mechanism than I gained from hers. By the time we dissolved the alliance, she had established an insurmountable advantage. The lesson was clear—equal divisions rarely create equal benefits in a game with such asymmetric clan powers.
Clan selection creates the foundation for alliance potential, establishing what unique advantages you can offer potential partners. Some clans, like the Koi with their extra political mandates, make naturally attractive allies because they provide benefits that extend to their partners. Others, like the Dragonfly with their movement advantages, offer less direct alliance value but can still be desirable partners in specific board situations.
My friend Pete, who approaches games with remarkable strategic clarity, developed an interesting framework for alliance compatibility based on clan abilities. “There are force multiplier clans and resource generator clans,” he explained during a post-game analysis. “The strongest alliances pair one of each.” His observation has proven consistently accurate—partnerships between clans like the Koi (who multiply mandate effectiveness) and the Bonsai (who generate coin advantages) tend to create more mutually beneficial dynamics than alliances between clans with similar functional roles.
The seasonal structure of Rising Sun creates distinct alliance considerations for each phase of the game. Spring alliances, formed before any territories are controlled, operate almost entirely on promised future behaviors rather than immediate advantages. Summer alliances build upon established positions and often focus on consolidating territorial control. Fall alliances, if they form at all, tend to be opportunistic and focused on specific win-blocking objectives rather than broad cooperation.
This seasonal evolution became clear during a game where I maintained the same alliance partner (my brother-in-law Mike) throughout all three seasons but completely renegotiated the terms of our cooperation at each seasonal tea ceremony. Our Spring alliance focused on dividing the map into spheres of influence, with minimal specific commitments. By Summer, we’d established clear protocols for which mandate benefits would flow to which player. In Fall, our alliance became much more transactional, essentially operating as a non-aggression pact with specific agreements about harvest distribution. This dynamic evolution allowed our partnership to remain mutually beneficial despite the changing game state.
Geographic proximity creates natural alliance tensions that must be addressed explicitly during negotiations. Adjacent clans will inevitably compete for territory, making alliances between neighbors inherently more complex than those between clans operating in different regions. I’ve found that successful neighbor alliances require much more detailed territorial agreements, often specifying exactly which provinces each clan will prioritize and how contested regions will be resolved.
During a five-player game where I found myself (as the Turtle Clan) positioned directly adjacent to Linda’s Lotus Clan, we formed what the other players dubbed a “border treaty” rather than a full alliance. Our agreement specified exactly which provinces each of us would control, with careful attention to ensuring both received territories that synergized with our clan abilities. This highly structured arrangement allowed us to avoid wasteful conflict despite our geographic overlap, creating mutual advantage without requiring broader strategic alignment.
Mandate selection presents perhaps the most crucial aspect of alliance benefits. The ability to coordinate which political mandates each ally selects, ensuring complementary actions rather than redundancy, creates significant advantages over non-allied players who must react to mandates rather than anticipating them. Establishing clear communicationabout mandate priorities before each political phase maximizes this advantage.
I recall a particularly effective alliance with my colleague Jim, who approaches Rising Sun with almost mathematical precision. Before each mandate selection, we’d quickly confer about our priorities for the round. If we both wanted different mandates, no coordination was necessary. But when we both valued the same mandate (typically Recruit or Marshal), we’d establish who needed it more urgently and compensate the other for selecting a less preferred option. This mandate coordination alone provided efficiency that non-allied players simply couldn’t match, allowing us to effectively execute two coordinated strategies rather than a single consolidated one.
Battle coordination represents another cornerstone of effective alliances, particularly in managing the ronin economy. Allied clans can strategically allocate their ronin recruitment, ensuring that each has sufficient forces for their priority battles while avoiding wasteful overbidding on mercenaries. This coordination extends to battle selection itself, with allies agreeing which conflicts each will prioritize to avoid competing for the same victories.
During a tournament game (yes, I occasionally play Rising Sun competitively, which Linda finds endlessly amusing), my alliance partner and I developed a surprisingly effective battle coordination system. We each identified our two highest-priority provinces for the upcoming battle phase, ensuring no overlap in these primary targets. For secondary targets, we established a rough coin bidding limit to avoid driving up ronin costs for each other. This systematic approach allowed both of us to secure our most valuable provinces while spending significantly fewer coins than our opponents, who often found themselves in unintentional bidding wars.
The betrayal mechanics—when seasonal alliances dissolve—adds a fascinating meta-layer to negotiation strategies. Every alliance in Rising Sun is temporary, with the final season typically featuring no formal partnerships. This inevitability of betrayal shapes alliance negotiations from the very beginning, as effective players must simultaneously plan for cooperative advantage and position themselves for the post-alliance conflict.
My approach to this betrayal dynamic has evolved significantly over dozens of plays. In early games, I tended to form alliances with minimal consideration for the eventual dissolution, focusing entirely on immediate benefits. The resulting betrayals often found me poorly positioned and vulnerable. Now I explicitly factor post-alliance positioning into every negotiation, sometimes declining otherwise favorable partnerships if they would leave me excessively vulnerable when alliances break. As the saying goes, “Keep your friends close, but keep your exit strategy closer.”
My friend Sarah, who has a remarkable talent for social deduction games, applies what she calls the “selective transparency” approach to alliance negotiations. “I tell my allies exactly what I intend to do—except for the one thing I don’t tell them,” she explained after executing a particularly elegant betrayal. This method of being honest about most intentions while maintaining strategic ambiguity about key vulnerabilities has proven remarkably effective, creating alliances built on sufficient trust to function while preserving the leverage needed for the inevitable dissolution.
Resource asymmetry between clans creates natural alliance opportunities that benefit both parties. Clans with coin generation advantages but limited force projection can pair effectively with militarily strong clans that struggle with economy. Similarly, clans with strong harvesting abilities often align well with those who excel at territorial control. Identifying these complementary resource profiles forms the basis for many of the most successful alliances I’ve witnessed.
In a recent game, I observed a particularly effective alliance between the Lotus Clan (with strong harvesting capabilities) and the Bonsai Clan (with economic advantages). Rather than competing for the same provinces, they established a resource-sharing arrangement where Bonsai controlled key economic territories and shared coin advantages, while Lotus managed harvesting provinces and shared collected virtues. This specialization allowed both clans to leverage their unique strengths while compensating for individual weaknesses—the essence of mutually beneficial alliance.
The social dimension of alliance negotiation cannot be overlooked, despite my tendency toward analytical optimization. Effective communication, reliability, and the perception of fairness significantly impact alliance effectiveness beyond the pure mechanical advantages. I’ve found that even slightly less optimal alliances with trusted partners often outperform theoretically superior arrangements with players whose negotiation style creates uncertainty or tension.
My colleague Mark, who tends toward aggressive gameplay, once formed an alliance with me that looked perfect on paper—our clan abilities complemented each other beautifully, and our starting positions created minimal territorial conflict. Yet the alliance functioned poorly because his communication style left me constantly uncertain about his intentions. Contrast that with a later alliance with Pete, which offered fewer obvious synergies but operated smoothly due to his clear, consistent communication about priorities and expectations. The lesson was clear—mechanical optimization means little without social alignment.
Alliance negotiation timing creates interesting strategic considerations. While formal alliances form only during seasonal tea ceremonies, the discussions that shape these partnerships often begin much earlier. I’ve found that initiating alliance conversations before the game begins, based solely on clan selection, often yields more strategically sound partnerships than reactive alliances formed in response to immediate board positions.
During a recent game with players of mixed experience levels, I observed how dramatically timing affected alliance quality. The more experienced players had begun informal alliance discussions during clan selection, identifying potential synergies before territories were even claimed. The newer players, by contrast, approached the first tea ceremony with no predetermined preferences, making decisions based solely on the opening board state. The resulting difference in alliance effectiveness was striking—the pre-planned partnerships operated with clear strategic alignment from the first turn, while the reactive alliances struggled to establish consistent cooperative patterns.
The shifting value of different mandates throughout the game creates another dimension of alliance negotiation. Spring politics typically emphasize Recruit and Marshal actions to establish initial positions. Summer often values Harvest and Train as resource engines develop. Fall frequently prioritizes Marshal and Betray as final positions are contested. Effective alliance negotiations account for these shifting priorities, establishing flexibility in mandate coordination rather than fixed patterns.
I discovered the importance of this seasonal adaptation during a game where our alliance agreement specified a rigid mandate selection pattern regardless of game state. By Summer, this inflexibility had become actively detrimental as the board situation demanded different priorities than we’d initially established. In subsequent games, I’ve approached mandate coordination with phase-specific considerations, renegotiating priorities at each seasonal transition to ensure our alliance remains responsive to the evolving game state.
Public perception of alliances influences their effectiveness beyond the mechanical advantages they provide. When other players perceive an alliance as particularly strong, they often respond with increased aggression or counter-alliances, potentially negating the original partnership’s advantages. Conversely, alliances that appear less threatening may operate with reduced interference, sometimes generating greater actual benefit despite less obvious synergies.
This perception management became apparent during a five-player game where my alliance with Linda appeared so dominant on paper that the other three players essentially formed a counter-coalition, coordinating their actions specifically to undermine our position. In a later game, I formed a much less ostentatious alliance with a less experienced player, drawing minimal attention despite actually securing more cumulative advantage than the previous partnership. This experience taught me the value of alliance subtlety—sometimes the most effective partnerships are those that generate significant advantage without appearing to do so.
The mathematical evaluation of alliance benefits provides a useful framework for negotiation, but the psychological aspects of these partnerships often prove equally important. Players who feel they’re receiving fair value from an alliance generally cooperate more effectively than those who suspect they’re being exploited, even if the objective benefit distribution is identical. I’ve found that explicitly acknowledging each player’s contributions to the alliance, particularly when they make sacrifices for mutual benefit, significantly enhances cooperation quality.
During a particularly complex game with our regular group, my alliance with Pete encountered a situation where mandate selection forced one of us to accept a significantly suboptimal action. After discussing the options, Pete voluntarily took the less valuable mandate, allowing me to execute a critical recruitment. Rather than simply accepting this sacrifice, I explicitly acknowledged it and committed to reciprocating at the next opportunity. This transparency about value exchange maintained our cooperative effectiveness even through temporarily imbalanced interactions.
After all these games and all this analysis, perhaps the most important insight I’ve gained about alliance negotiation in Rising Sun is that the best partnerships aren’t those that maximize absolute advantage but those that create resilient cooperation through perceived fairness and mutual respect. The mechanical optimization of complementary clan abilities and efficient mandate selection provides the foundation, but the human elements of communication, reliability, and reciprocity determine whether an alliance thrives or collapses under the weight of suspicion and uncertainty.
I still occasionally misjudge alliance dynamics or fail to anticipate how game developments will affect our partnership’s value proposition. But those missteps have become rarer as I’ve developed a more nuanced understanding of what makes alliances truly beneficial for both parties. There’s something deeply satisfying about executing a perfectly coordinated strategy with a trusted ally, even knowing that our partnership will inevitably dissolve into competition as the seasons change.
And really, isn’t that tension between cooperation and competition what makes Rising Sun so fascinating? The knowledge that today’s ally will become tomorrow’s opponent creates a negotiation landscape unlike any other game in my collection. Now if you’ll excuse me, I need to go review my notes on Koi Clan alliance strategies before our game night tomorrow. Linda has already challenged me to ally with her, and I suspect she’s been developing some new negotiation tactics I haven’t seen before.
The first time I accused someone of being a hybrid in Unfathomable, I was spectacularly wrong. Not just slightly mistaken—I was so confidently incorrect that I convinced half the table to distrust one of the most loyal humans we had. By the time we realized my error, the actual traitor had sabotaged three critical tests, and our ship was being dragged inexorably toward the depths. Jeff still brings this up whenever we play hidden traitor games: “Remember when David was so sure I was the hybrid that he got me locked in the brig? Good times.”
After 37 games of Unfathomable (yes, I track my plays—Linda rolls her eyes every time I update my spreadsheet), I’ve developed a systematic approach to traitor detection that has dramatically improved our human win rate. It’s not foolproof—nothing in a well-designed hidden traitor game ever is—but these techniques have transformed our success rate from about 30% to closer to 70%.
The key insight that changed everything was recognizing that effective traitor detection isn’t about finding a smoking gun—it’s about identifying patterns of behavior that gradually reveal someone’s true loyalties. Unfathomable is a game of subtle tells and accumulated evidence, not dramatic revelations.
Let me walk you through the techniques that have proven most reliable:
First principle: Track resource commitment patterns, not just individual actions. New players often fixate on whether someone contributed to a specific crisis. This narrow focus is easy for traitors to manipulate. Instead, observe patterns across multiple crises—specifically, when and how players commit their limited resources.
I maintain a mental log of each player’s resource contributions across crises. The pattern that often emerges with traitors isn’t that they never help—it’s that they help just enough to maintain plausible loyalty while preserving resources for moments of maximum impact. A player who contributes precisely one card to every crisis, regardless of importance, is displaying a classic traitor pattern.
My friend Tony demonstrated this perfectly in our last game. He contributed exactly one card to six consecutive crises—sometimes a high value when the crisis seemed likely to fail anyway, sometimes a low value when success seemed assured. This consistent pattern preserved his hand while appearing to help. By the time I pointed out this pattern to the table, he had accumulated enough cards to singlehandedly tank a critical late-game crisis.
Second principle: Pay attention to timing and positioning, not just outcomes. Traitors often manipulate not whether a crisis fails, but when and how it fails. A crisis that fails by exactly one point after everyone has committed is far more suspicious than one that fails by a large margin.
In a recent game, we faced a crisis requiring 12 points to succeed. Five players had committed cards face-down. The total revealed was 11—one short of success. This precision failure immediately raised red flags. When this pattern repeated on the next crisis—failing by exactly one point—we knew someone was carefully calculating their sabotage. After cross-referencing who had committed to both crises, we correctly identified my son Alex as the traitor. He later admitted he’d been meticulously tracking our potential contributions to ensure the failures looked like bad luck rather than sabotage.
Third principle: Watch movement patterns and position exploitation. Hybrid traitors need to be in specific locations to maximize their sabotage potential. Their movement often betrays their intentions several turns before they actually sabotage.
I’ve found it helpful to mentally classify ship locations into “high-value target” and “low-value target” areas. High-value targets include the Engine Room during engine track crises or the Captain’s Cabin during a mutiny attempt. A player consistently positioning themselves near high-value targets—especially when there are more pressing threats elsewhere—often reveals traitor tendencies.
In one memorable game, Kevin kept navigating to the Lounge whenever he wasn’t directly needed elsewhere. This seemed innocent until we realized the Lounge gave him perfect positioning to reach either the Engine Room or the Captain’s Cabin at a moment’s notice. This flexible positioning allowed him to respond to whichever crisis would be most devastating to sabotage. Once I pointed out this pattern, the table became suspicious, and Kevin’s effectiveness as a traitor diminished significantly.
Fourth principle: Analyze information management behaviors. Loyal humans benefit from information sharing, while traitors benefit from information hoarding or manipulation. Watch how players handle their knowledge of the deck compositions, other players’ cards, and upcoming threats.
In Unfathomable, a player who consistently chooses not to use abilities that would reveal information about upcoming threats or other players’ hands is often hiding something. Similarly, a player who seems unusually interested in what cards others are holding may be identifying the perfect moment for sabotage.
Linda (my wife, who’s terrifyingly good at hidden traitor games) once gave herself away through information management. She was playing Captain Hector Standish, whose ability allows peeking at another player’s loyalty. She claimed to check two players and confirm they were human, but never initiated discussions about checking others. This reluctance to gather critical information—information that would only harm a traitor—eventually exposed her hybrid nature.
Fifth principle: Note reaction inconsistencies, not just game actions. How a player responds to setbacks, accusations, or successes often reveals more than their actual plays. Traitors frequently display subtle inconsistencies in their emotional responses that loyal players don’t.
I once noticed that my friend Jake showed visible relief when a crisis he hadn’t contributed to succeeded. This seemed odd—why would a loyal human be relieved rather than concerned about a crisis they hadn’t helped with? The answer became clear two turns later when he sabotaged a much more critical crisis. His relief had been because the earlier success maintained his cover while preserving his sabotage cards for maximum impact.
These reaction tells are subtle—a momentary expression, a slight change in engagement, an unusual comment. They’re easy to miss in the moment but powerful when tracked across an entire game. I’ve started paying as much attention to how people respond to outcomes as to the outcomes themselves.
Let’s shift to some practical applications of these principles. How do you implement this kind of behavioral analysis without creating a paranoid atmosphere that undermines the humans’ need for cooperation?
The approach I’ve found most effective is what I call “progressive trust building.” Rather than starting from universal suspicion, assume loyalty but verify through consistent behavior. Each player begins with a mental “trust score” that adjusts based on their observable patterns. This approach prevents the destructive spiral of early, unfounded accusations while maintaining vigilance.
In practice, this means I rarely make accusations before the halfway point of the game. Instead, I focus on gathering evidence and observing patterns. By mid-game, these patterns usually highlight 1-2 players with significantly more suspicious behaviors than others. Only then do I bring my concerns to the table, backed by specific observed patterns rather than gut feelings.
This measured approach prevents traitors from exploiting the humans’ tendency toward infighting. In one particularly successful game, I noticed suspicious patterns from Tony but deliberately held my accusations until I had documented three specific behavioral inconsistencies. When I finally presented my case, it was compelling enough that even Tony’s closest ally at the table became convinced. Had I accused earlier with less evidence, I might have simply created division among the humans.
The flip side of traitor detection is traitor misdirection—techniques that loyal humans can use to identify each other and build trust without revealing that information to traitors. The most effective technique I’ve found is what I call “trust triangulation.”
This involves creating situations where only loyal humans would make certain choices, then observing who makes them. For example, a loyal human might deliberately take a suboptimal action that only benefits the humans if certain hidden information is true. Players who recognize and support this strategy reveal themselves as likely humans.
In our most recent game, I was playing Father Grimoire and had information about an upcoming crisis that would be devastating if failed. Rather than announcing this directly (which would alert any traitor), I made an apparently irrational movement to the Engine Room and committed significant resources there. Only a loyal human who trusted my judgment would follow this move without explanation. Two players did exactly that, creating our core “trust triangle” of confirmed humans. This approach identified allies without tipping off the traitor.
The social dynamics of traitor detection require careful handling. Aggressive accusers often find themselves isolated, even when correct, because the social cost of their approach outweighs the informational benefit. I’ve found that framing observations as questions rather than accusations maintains group cohesion while still highlighting suspicious patterns.
Instead of saying “Tony is definitely the traitor because he always contributes exactly one card,” I might ask, “Tony, I’ve noticed you’ve contributed exactly one card to the last four crises regardless of importance. What’s your thinking behind that approach?” This invites explanation rather than defense and keeps the discussion productive rather than adversarial.
Some specific behavioral red flags have proven particularly reliable in identifying traitors:
The “Helpful Suggester” who consistently proposes plans that seem cooperative but subtly advantage the Deep Ones. These players often suggest dividing resources in ways that prevent concentrated defense of critical areas. Watch for players who advocate spreading thin rather than prioritizing key threats.
The “Crisis Manager” who seems overly interested in who will contribute to each crisis and often volunteers to collect and submit the cards. This position allows them to know exactly how much to sabotage or create confusion about who contributed what. A player repeatedly seeking this role deserves extra scrutiny.
The “Efficiency Expert” who always has logical reasons why they specifically can’t help with the current crisis. Their arguments make perfect sense individually but form a pattern of non-commitment across the game. Their efficiency somehow never translates to meaningful progress for the humans.
The most sophisticated traitors adopt what I call “selective competence”—they play brilliantly when their actions don’t matter and make “reasonable mistakes” at critical junctures. This technique is particularly effective because it’s hard to distinguish from a good player having occasional bad luck. The counter is tracking the consequences of these “mistakes” rather than their apparent reasonableness.
In one game, my friend Marcus (a very skilled player) made several “reasonable mistakes” that each happened to benefit the Deep Ones significantly. Each mistake seemed plausible in isolation, but the consistent direction of their impact eventually revealed his hybrid nature. A loyal human’s mistakes would occasionally benefit the humans through sheer randomness—his never did.
Of course, no detection system is perfect. In a well-designed hidden traitor game like Unfathomable, skilled traitors can sometimes evade even the most careful observation. The final line of defense is always proper risk management—never creating single points of failure where one traitor can guarantee a loss.
This means never allowing any single player (no matter how trusted) exclusive control over critical decisions, maintaining resource reserves for unexpected sabotage, and creating redundancy in defense plans. Even if you can’t identify the traitor, you can minimize their impact through careful structural protections.
In our most successful game as humans, we never conclusively identified the traitor (it turned out to be Linda, who played a masterfully subtle game). However, we won because we implemented structural protections that limited any individual’s ability to cause catastrophic damage. Sometimes containing a threat is as effective as exposing it.
The beauty of Unfathomable’s traitor mechanics lies in this delicate balance of suspicion and necessity. The humans must work together to survive, yet trust is a luxury they can’t afford. Navigating this tension—building just enough trust to function while maintaining just enough suspicion to catch sabotage—creates the exquisite social puzzle at the game’s heart.
So the next time you find yourself aboard the SS Atlantica, watching your fellow passengers for signs of inhumanity, remember: it’s not about finding a single damning action. It’s about observing patterns, tracking resource commitments, analyzing positioning, monitoring information management, and noting emotional inconsistencies. These techniques won’t guarantee you’ll spot every traitor—but they’ll ensure that when a hybrid sabotages your ship, at least you’ll know who to blame as you sink beneath the waves.
The first time I played Tapestry, I spread myself too thin. Like a kid in a candy store, I wanted a bit of everything—all four advancement tracks looked so appealing that I advanced one step on each before realizing I’d created a civilization that was mediocre at everything and exceptional at nothing. Predictably, I finished dead last, while my friend Tony, who had focused almost exclusively on the Military track, steamrolled everyone with his aggressive expansion.
“You can’t do everything, David,” he said afterward with a smirk. “Pick a lane.”
After 43 games (yes, I keep track—my gaming spreadsheet is a source of good-natured ribbing in our group), I’ve learned that Tony was partly right. You do need to pick a lane—but it’s rarely just one lane. The true power in Tapestry comes from identifying the perfect intersections between advancement tracks that create force-multiplying synergies for your specific civilization.
I’ve developed what I call the “Primary/Secondary/Support” framework for track advancement that has dramatically improved my win rate. In fact, I’ve won 8 of our last 12 games using this approach, which has led to Tony now refusing to sit next to me at the table. “You always attack the player on your left,” he complained last game night, which isn’t entirely untrue.
The core insight is simple: based on your civilization’s unique abilities, you should heavily prioritize one primary track (reaching the final tier), moderately advance on a complementary secondary track (reaching tier 3-4), and make minimal but strategic advances on one or both support tracks (reaching tier 1-2). This focused approach ensures you’re maximizing the synergies between tracks while playing to your civilization’s strengths.
Let’s dig into how to identify the optimal track combinations for each civilization type:
Military-focused civilizations (Militants, Conquerors, etc.) obviously benefit from the Military track as their primary advancement path, but the secondary track choice makes a huge difference in their effectiveness. I’ve found Science works beautifully as a secondary for military civilizations—the extra dice from Science advancements significantly increase your combat effectiveness, while the technology cards often provide resource generation that fuels further military expansion.
In a memorable game where I played the Militants, I pushed hard on Military (primary) and Science (secondary), while making a single strategic advance on Exploration to secure a valuable territory. By mid-game, I was rolling three dice in combat (base die + Science bonus + Military tier 3 bonus) and consistently winning encounters, while my Science track provided the income to keep my military machine running. The combined effect was devastating.
Science-focused civilizations face a critical decision that many players get wrong: whether to pair with Technology or Military as a secondary track. After dozens of games, I’m convinced that Military provides the stronger synergy for most science civilizations. The exploration opportunities from Military advancement let you place your outposts strategically to maximize income, which fuels further Science advancement.
The Inventors, with their ability to gain additional technology cards, represent an exception to this rule. For them, Technology makes the stronger secondary track, creating a powerful engine where Science advancements fuel technology acquisition, which in turn provides benefits that make Science advancement easier.
I played a game as the Inventors where I rushed up the Science track, using my civilization ability to acquire technologies at a discount. By the second income turn, I had technologies that increased my Science income, which funded further Science advancement, which gave me more technologies… you get the idea. I barely touched Military (just one tier for basic exploration) but still won handily through sheer technological superiority.
Exploration-focused civilizations benefit from a less obvious primary/secondary combination: Exploration primary paired with Technology secondary. Many players instinctively pair Exploration with Military, which isn’t wrong but misses the incredible resource engine that Technology provides to fuel your exploration efforts.
My wife Linda demonstrated this brilliantly in our last game. Playing as the Explorers, she focused heavily on Exploration with Technology as her secondary. The resource generation from her Technology advancements funded her exploration efforts, while her Exploration bonuses gave her the perfect territories to maximize her technology benefits. She made a single strategic advance on Military just to gain the ability to conquer, but otherwise stayed laser-focused on her Exploration/Technology synergy. The resulting point engine was impressive, generating nearly 30 points in the final era alone.
Technology-focused civilizations have the most flexible pairing options, but I’ve found Technology primary with Science secondary creates the most consistent results. The income generation from Science advancements fuels your technology acquisition, while the extra dice and bonuses from Science make your civilization more adaptable.
In one particularly satisfying game, I played the Tinkerers with their technology cost reduction ability. I rushed Technology as my primary, using Science as my secondary for the income and dice bonuses. By mid-game, I was acquiring technologies at a significant discount and had built a synergistic tableau that generated resources, victory points, and advancement opportunities simultaneously. The key insight was using my Science advancements not for their immediate benefits but to fuel the Technology engine.
Beyond these broad categories, specific civilization abilities sometimes suggest counterintuitive track combinations. The Alchemists, for instance, with their ability to convert resources, benefit tremendously from Exploration primary and Technology secondary—a combination that generates a wide variety of resources that their conversion ability can optimize.
I once played against my friend Jeff who used this exact combination with the Alchemists. By the final era, he was converting his abundant resources into exactly what he needed each turn, allowing him to make opportunistic advancements that the rest of us couldn’t match. His civilization wasn’t the strongest in any single category but had unmatched flexibility.
The Craftsmen present another interesting case. Their ability to gain bonus resources when gaining tapestry cards suggests Technology primary (for the tapestry card frequency), but I’ve found Science actually makes a stronger primary track with Technology as secondary. The income from Science ensures you can always play the tapestry cards you receive, maximizing the benefit from your civilization ability.
My son Alex used this approach in a recent game, combining Science primary, Technology secondary, and a minimal Exploration investment. The Science income funded his tapestry card plays, which triggered his Craftsmen ability for bonus resources, which further fueled his advancement. It was a beautiful cascade effect that none of us could match.
The timing of track advancements is just as important as which tracks you choose. Many players make the mistake of advancing evenly across their chosen tracks, which dilutes their civilization’s strengths at critical moments. Instead, I recommend a “sprint and consolidate” approach—push hard on your primary track early, then develop your secondary track, then make strategic advances on support tracks only when specific benefits align with your strategy.
In practice, this often means reaching tier 3-4 on your primary track before making significant investments in your secondary track. This focused approach ensures you’re gaining the force-multiplying benefits of the higher tiers on your primary track when they matter most—during the middle eras when the game state is still fluid.
I demonstrated this in a recent game as the Isolationists. I sprinted up the Military track to tier 4 before making any significant advances on my secondary Science track. This allowed me to establish a dominant position on the map early, claiming key territories that provided income for the remainder of the game. Only after securing this position did I develop my Science track to enhance my combat effectiveness and resource generation.
The importance of making strategic one-tier advances on support tracks cannot be overstated. Often, the first tier of a track provides benefits disproportionate to its cost, especially when it enables a key element of your strategy. For instance, a Science-focused civilization might benefit enormously from a single Military advancement just to gain exploration capabilities.
My friend Tony (yes, the same one who told me to “pick a lane”) demonstrated this perfectly in our most recent game. Playing as the Scientists, he focused primarily on Science with Technology as his secondary. However, he made a single strategic advance on Military specifically to gain exploration capabilities, which he used to place his outposts adjacent to benefit-producing territories. That one-tier investment in a support track paid dividends throughout the game.
The interact advancement on each track represents a critical decision point. These advancements allow you to affect other players, but they also divert resources from your core strategy. I’ve found that interact advancements on your primary track are usually worth taking, while those on secondary or support tracks rarely justify their opportunity cost.
In one particularly cutthroat game, I played the Militants with Military primary and Science secondary. I took the Military interact advancement early, which allowed me to conquer opponents’ territories. This not only generated points for me but denied resources to my opponents, creating a double benefit that justified the investment. However, I deliberately skipped the Science interact advancement, recognizing that the resources would be better spent advancing further on my primary Military track.
The trap tracks—those that seem aligned with your civilization but actually distract from stronger synergies—vary by civilization. For the Militants, Technology often serves as a trap track. While the extra resources seem helpful, they rarely justify the opportunity cost of not advancing further on Military or Science. For the Futurists, Exploration often becomes a trap, diverting resources from the more powerful Science/Technology combination.
I watched Kevin fall into this trap playing as the Futurists. He divided his efforts between Science, Technology, and Exploration, reasoning that all three seemed valuable. By the final era, he had advanced to tier 3 on all three tracks but reached tier 5 on none—leaving him with a civilization that had interesting options but lacked the high-tier benefits that win games.
The impact of landmark buildings on track selection cannot be overlooked. These buildings often provide benefits that complement specific tracks, creating additional synergies to consider. The Academy, for instance, pairs beautifully with Science advancement, while the Armory naturally complements a Military focus.
In a recent game, I specifically adjusted my advancement strategy to claim the Archive early, knowing its benefits would compound with my Science-focused strategy. This adjustment—making an earlier than planned advance on Exploration to reach the territory containing the Archive—paid dividends throughout the game as the Archive’s benefits multiplied the effectiveness of my Science advancements.
The final consideration in track selection is adaptability within your framework. While the Primary/Secondary/Support approach provides strategic focus, the best players adjust their specific advancement timing based on the emerging game state. If a particularly valuable territory appears, a temporarily increased investment in Military or Exploration might be justified. If an opponent is clearly pursuing the same primary track as you, accelerating your advancement to claim key benefits first becomes critical.
In my most satisfying Tapestry victory, I played the Historians with Technology as my primary track and Science as secondary. When I realized my left-hand opponent was also prioritizing Technology, I temporarily diverted resources to accelerate my Technology advancement, ensuring I reached key thresholds first. This adaptive approach within my strategic framework allowed me to claim the most valuable technologies before they could, establishing a lead that persisted throughout the game.
Tapestry’s depth comes from these interacting systems—civilization abilities, advancement tracks, landmark buildings, and the emerging game state all influence optimal strategy. By applying the Primary/Secondary/Support framework, you create strategic focus while maintaining the flexibility to adapt to specific game conditions.
So the next time you sit down to play Tapestry, resist the temptation to advance evenly across all tracks. Instead, identify the track combination that creates perfect synergy with your civilization’s unique abilities. Sprint up your primary track, develop your complementary secondary track, and make strategic advances on support tracks only when specific benefits align with your strategy. This focused approach transforms Tapestry from a game of interesting but disconnected advancements into a powerful engine of civilization development—and dramatically improves your chances of victory.